


How To Set The Right Tower Height For Your Counter
Share
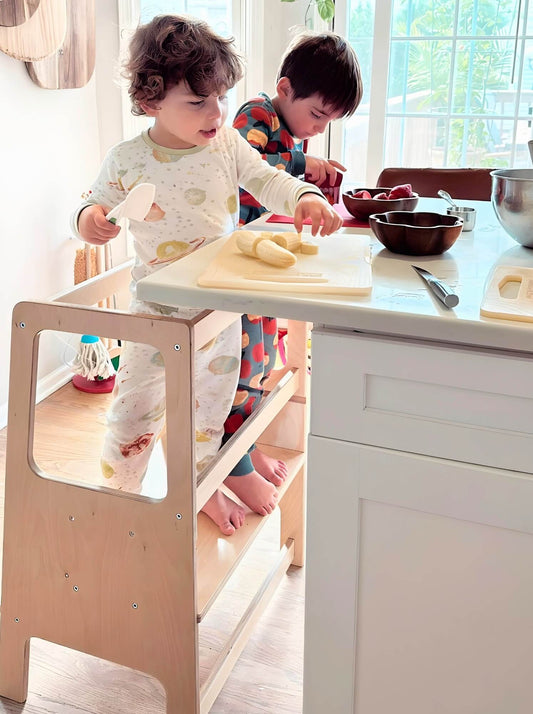
A kitchen helper tower should feel effortless: the child steps up, plants their feet, and can whisk, wash, or nibble berries without reaching or hunching. Getting that ease comes down to one deceptively simple decision: the tower height. Set it right, and kids are safer, more comfortable, and more eager to help. Set it wrong, and you'll see tip-toeing, leaning, or constant adjustments. This guide breaks down exactly how to dial in the right tower height for your counter, with clear steps, formulas, and real‑world checks.
Why Tower Height Matters
Small adjustments in platform height have big ripple effects:
-
Comfort and posture: If the counter is too high relative to the child, they'll shrug their shoulders, reach up, and fatigue faster. Too low, and they'll bend at the waist and lean, which also tires them and makes them less precise.
-
Safety and stability: An too-low platform encourages tip‑toes and grabbing the counter edge for balance. A over‑high platform can lead to leaning and shifting weight forward. Both increase fall risk.
-
Skill building: When elbows are at a good working level, kids can whisk, spread, slice soft foods with a kid‑safe knife, and wash produce with better control. That success keeps them engaged.
- Longevity: The right setup means you won't be constantly re‑drilling or "making do." Adjustable towers shine here because they grow with the child and work at different counters.
In short, height isn't cosmetic; it's the engine for safety, comfort, and skill development.
Measure Your Counter And Your Child
Measure Countertop Height Accurately
Most kitchen counters in the U.S. are about 36 inches high. Islands can run taller, and bar counters are often 42 inches. Don't assume, grab a tape:
- Place the tape on the finished floor (not a mat).
- Measure straight up to the countertop's top surface.
- Record that number in inches or centimeters.
If you'll use the tower at more than one spot (say, the sink and an island), measure each. The final platform position may differ by location.
Find Your Child's Standing Elbow Height
Elbow height is the key dimension because it ties directly to a comfortable work posture.
Quick method:
- Have the child stand barefoot, relaxed, arms bent to 90 degrees, forearms parallel to the floor.
- Hold a flat object (a book or ruler) under the elbow and mark that level on a wall.
- Measure from the floor to the mark. That's standing elbow height.
Tip: Do this at the time of day they normally help in the kitchen. Tired kids "stand" differently, and shoes add height. Measure barefoot if they'll use the tower barefoot.
Recommended Height Formulas And Clearances
Rule Of Thumb: Platform Height Vs. Countertop
Ergonomics research on light kitchen prep suggests the ideal work surface is near elbow height or slightly below it. Translated for kids on a tower:
- Ideal counter relative to elbow: 0 to 2 inches (0–5 cm) below the child's elbow for most light‑to‑moderate prep.
- For heavier pressing (kneading dough), a tad lower can feel stronger: for delicate decorating, elbow‑level can be nice.
Working formula:
- Platform height = Countertop height − Desired elbow‑to‑counter clearance.
Example: If the counter is 36 inches and the child's elbow height is 18 inches, aim for the counter to be 0–2 inches below elbow level. So desired clearance is 0–2 inches, which means platform height = 36 − (18 − 0 to 2) = 18 to 16 inches. In practice, place the platform so that when the child stands, their elbow sits just a hair above the counter edge or at the same level.
Rapid rule: If you don't have exact measurements, start with the platform set so the counter roughly aligns with the child's lower forearm (just below the elbow crease). Fine‑tune from there.
Safety Clearances: Guardrails, Steps, And Toe Space
- Guardrail height above platform: Ensure the top rail (or upper enclosure bar) comes up above the child's waist. A practical check: the child's belly button should be below the top rail, and they shouldn't be able to climb over it easily.
- Opening sizes: Openings should comply with head entrapment guidelines and must not allow openings between 3.5 inches and 9 inches, which can pose a head entrapment risk.
- Step geometry: Steps should be even and deep enough to plant the whole foot. If the child has to toe‑tip the step, the platform is likely set too high, or the tower needs to be repositioned.
- Toe clearance: Leave a small toe gap under the counter edge so the child can get close without bumping knees, but keep the tower tight to the counter to remove tempting gaps.
Above all, supervision is non‑negotiable; adjustments don't replace an adult within arm's reach.
Set Up And Fine‑Tune The Platform Height
Dialing In Comfort: Posture, Reach, And Grip Zones
After setting the platform from your measurements, do a live test at the counter you'll use most:
- Shoulders relaxed: If shoulders creep toward the ears, the counter is too high relative to the elbow; lower the platform.
- Neutral wrists: Hands resting on the counter should keep wrists straight, not cocked up. If the child must extend wrists to reach, lower the platform. If they're dropping wrists and bending forward, raise it.
- Reach map: Place a few tasks, a cup for rinsing berries, a small board for slicing soft fruit with a kid‑safe knife, and a bowl for whisking. The child should reach all of these without leaning their torso on the counter.
- Edge grip test: They shouldn't need to white‑knuckle the counter edge to feel steady. If they do, the platform's too high or the base needs to be closer to the counter.
Two‑minute tweak: Move the platform height. Gains are obvious: kids stop tip‑toeing, elbows settle, and they can "own" their space.
Stability Checks And Anti‑Tip Practices
- Flush to the counter: Slide the tower so its front rails are tight to the counter edge. Remove floor mats that create rocking.
- Even floor contact: All feet should touch the floor with no wobble. Shim slightly if the floors are uneven.
- Centered load: Keep heavy bowls or mixers off to the side, not directly in front of the child.
- House rules: Always climb from the entry side, never the rails. Step down before moving the tower.
- Hazard scan: Avoid placing the tower near hot burners, sharp knife blocks, dangling cords, or open dishwashers.
- Optional add‑ons: Non‑slip pads and wall bumpers can add grip and protect finishes.
The right tower height turns kitchen time from a balancing act into a confidence builder. Measure the counter and your child's elbow height, set the platform so the counter sits at or just below elbow level, and then fine‑tune with quick posture checks. Stick with adjustable positions that maintain strong guardrail coverage, keep the tower flush and stable, and revisit the setup as kids grow.
Do that, and the tower becomes what it should be: a safe perch for curiosity, and a front‑row seat to family life at the counter. If you're exploring more ways to use your tower safely and effectively, you may also like Toddler Tower vs. Stool: What’s Safer for Kitchen Help? and Best Toddler Tower Activities.


 Off
Off
